
Registering your ID document in Freja eID has become smoother and easier. We have added frames and document templates to better show users, who downloaded the Freja eID app but have not yet confirmed their identity, where and how the ID document should be placed.
Adding an ID document to Freja eID enables you to access more connected services, in both public and private sector. It also gives you a digital ID card in your Freja eID app, which you can use to identify yourself and others in many real-life situations. In the latest update of the Freja eID app, we have made the process of ID document scanning smoother and clearer.
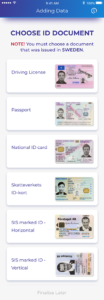
After downloading the app, confirming your email address and creating a PIN of choice, you are asked to choose an ID document you wish to add to your Freja eID-account. Once you have chosen the ID document, carefully read the instructions on how to scan it.
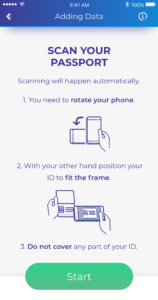
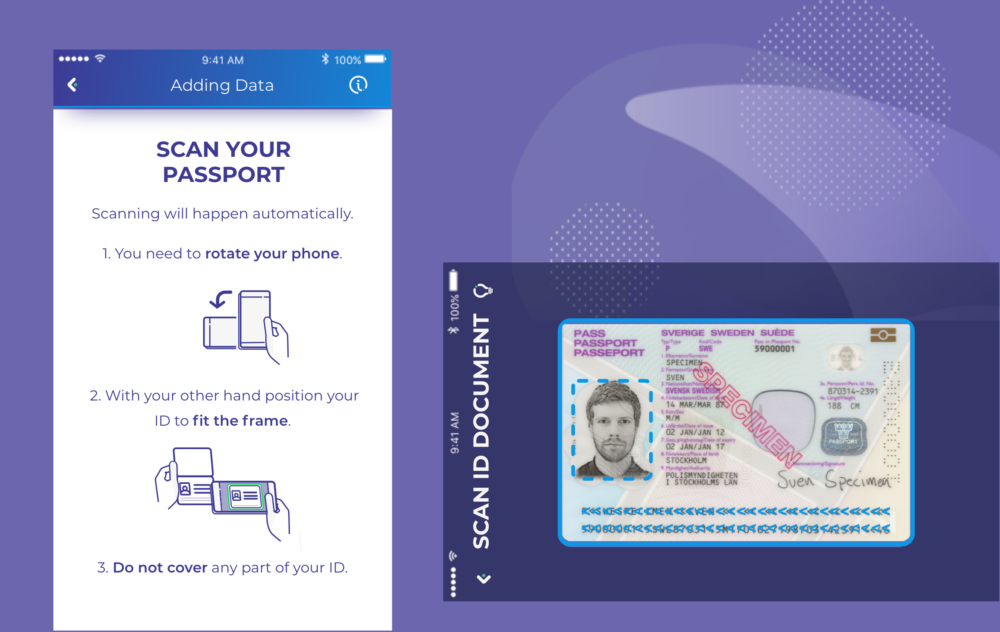
Note that it’s now needed to rotate the phone to correctly scan the document. On the scanning screen, you will see the blue frame in which you should fit the chosen document, as well as the template of that document. The purpose of the template is to showcase you how and where to place the document for correct scanning.
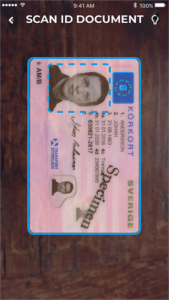
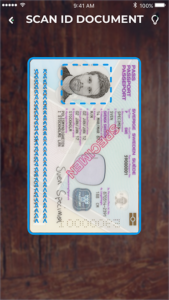
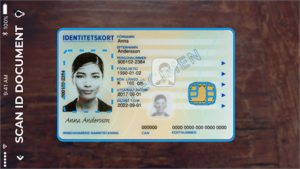
When the template fades out, position your ID document to fit the blue frame, so that your photo and the chip (or signature or some other important part of the document) are inside the frame. The app will automatically scan the ID document once it’s positioned well.
If the app fails to scan the ID document after 20 seconds, it will prompt you to manually take the photo of the ID document and enter the necessary data. The screen where you take the photo of the ID document also contains the frame and the template. The image of the ID document is important because our vetting operators use it to verify your identity, comparing it with the ID photo (headshot) you take in the app.